SolarPowerGuide
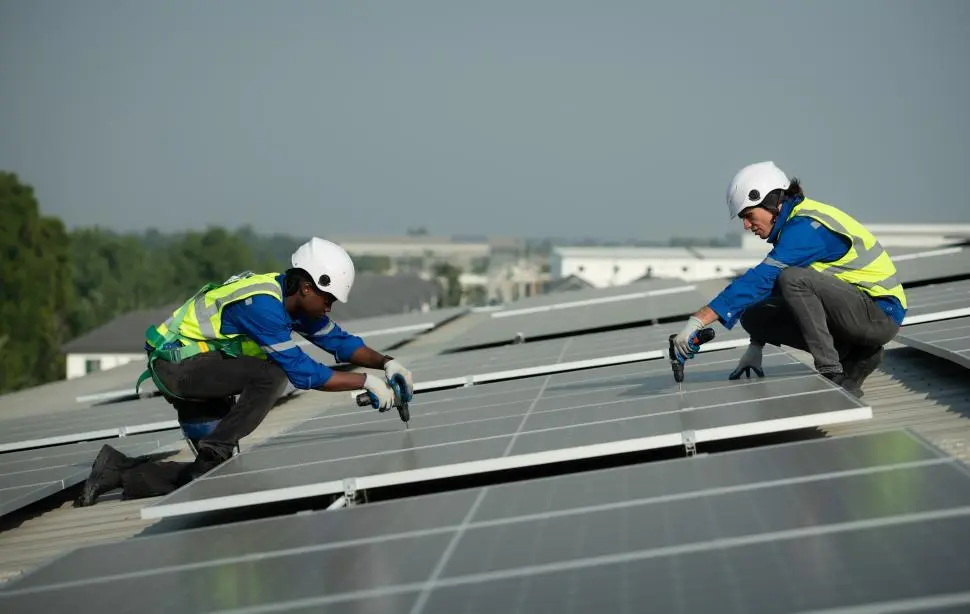
Solar technicians installing rooftop solar panels in South Africa

Solar Installation Guide

A step-by-step guide to planning, installing and signing off a home solar system in South Africa, with real costs and data from an off-grid home in KZN.

Complete guide

How to Install Solar Panels in South Africa

Installing a home solar system in South Africa comes down to seven steps: work out how much power you use, choose between grid-tied, hybrid and off-grid, size the inverter, battery and panels, check your roof and mounting, choose the equipment, install and wire it, then commission it and complete the paperwork. A capable homeowner can do much of the physical work, but connecting the system to your home's electrical installation and issuing the Certificate of Compliance must be done by a registered electrical contractor.

This guide is written from experience. My home in KwaZulu-Natal has run completely off-grid since June 2026 on a Deye 5kW hybrid inverter, a Dyness 16kWh battery and ten JA Solar panels, and I publish the real costs and the real production data. Where something worked differently in practice than on paper, I say so.

Who can do the work

Mounting and panel work: a capable DIYer or an installer. Connection to your home's wiring and the CoC: a registered electrical contractor only.

Paperwork

An electrical Certificate of Compliance (SANS 10142-1) for every system, plus SSEG approval if the system connects to the grid.

A typical home system

A 5kW hybrid inverter, 5 to 16kWh of lithium (LiFePO4) battery and roughly 4 to 6kW of panels.

What ours cost

About R141,320 over three years, including R35,500 to beat shading. See the full breakdown.

Step 1: Work out how much power you use

Every sizing decision that follows depends on this number, so get it right first. Take your last twelve months of electricity bills and note the kWh used each month. Divide a typical month by 30 to get your daily use, and pay attention to winter, when use is usually highest and solar production is lowest.

Then list the heavy loads in your home: the geyser, stove and oven, pool pump, borehole pump, kettle, air conditioners and tumble dryer. These decide how big the inverter must be and how fast the battery drains. Decide whether solar must run the whole house or only the essentials such as lights, fridges, Wi-Fi and TV.

From our install

Our geyser runs on gas, which takes the single biggest electrical load in most South African homes off the inverter entirely. Everything else, including the washing machine, tumble dryer, dishwasher, pool pump and borehole, runs on solar by scheduling the heavy loads for the sunny part of the day. See exactly how we scheduled them.

Step 2: Choose grid-tied, hybrid or off-grid

The type of system decides what equipment you need, what approvals apply and whether you have power during an outage.

Grid-tied Hybrid Off-grid
BatteryNoneYesYes, usually larger
Power in an outageNo, it shuts down with the gridYesNot affected by the grid
Grid approval (SSEG)YesYes, if connectedNo, but a CoC is still required
Best forCutting the daytime bill at the lowest costMost homes: backup plus savingsFull independence or no grid connection

For grid-connected systems, read how to register your solar system and net metering and feed-in tariffs. For off-grid, see permits and legal compliance for off-grid solar.

Step 3: Size the inverter, battery and panels

Inverter

Size the inverter for the most power you will draw at the same moment, not your daily total. A kettle, microwave and fridge running together can easily pass 4kW. A 5kW inverter runs a typical home well if heavy loads are staggered rather than switched on together. Can a 5kW hybrid inverter really run a home off-grid?

Battery

The battery has to carry you from late afternoon until the sun is strong enough the next morning, with a reserve for cloudy days. Lithium iron phosphate (LiFePO4) is now the standard for home systems. Compare usable capacity, not just the headline figure. Off-grid homes need far more storage than backup-only systems. Solar batteries explained.

Panels

Size the array for winter, not summer. You need enough panels to run the daytime loads and recharge the battery on short, low-sun winter days, and enough margin for overcast spells.

From our install

In our first eight days fully off-grid in June, peak production ranged from 1,158W on a heavily overcast day to 3,794W on a clear winter day. The battery's lowest charge in normal use was 22%, and winter sun brought it back to 66% by the same afternoon. Overcast days are what your sizing has to survive. See the full eight days of data.

Step 4: Check your roof, orientation, shading and mounting

In South Africa, north-facing panels produce the most over a year. East and west-facing roofs still work, with some loss, and a tilt close to your latitude gives good year-round output. Most pitched roofs are close enough.

Shading matters more than most people expect. Shade on part of a panel can drag down the output of the whole string, so check the roof at different times of day and in winter, when the sun is lower and shadows are longer.

From our install

Our property is surrounded by trees, so simply bolting panels to the existing roof would not have produced enough power. We built a dedicated elevated structure to lift the panels above the tree line and had an arborist cut back the canopy. That infrastructure cost R35,500, and it did more for winter production than extra panels at ground level ever could have. Read about our shading problem.

Fix any roof problems before the panels go up, because removing them later costs money. The mounting system depends on the roof: tile roofs use hooks fixed to the rafters, while IBR and corrugated sheet roofs use rails or brackets fixed through the sheeting with sealing washers. Always follow the mounting manufacturer's fixing specification, and on the coast choose corrosion-resistant aluminium and stainless steel hardware.

More detail: preparing your roof and mounting systems and panel orientation.

Step 5: Choose the equipment

  • Panels: buy through an official local distributor so the manufacturer's warranty is honoured. Why grey imports are a risk.
  • Inverter: hybrid for grid-connected homes that want backup, or an off-grid model with no grid. If you stay connected, the inverter usually has to be on your municipality's approved list. How to choose an inverter.
  • Battery: LiFePO4, and confirm it communicates properly with your inverter before you buy. We replaced our original 5kWh battery with a Dyness 16kWh unit, and here is why.
  • Protection: DC isolators, correctly rated fuses or breakers, surge protection on both the DC and AC sides, and proper earthing. This is the part cheap quotes leave out.

Step 6: Install and wire the system

A typical installation follows this order:

  1. Fix the rails or brackets to the roof according to the mounting manufacturer's specification.
  2. Mount the panels and wire them into strings, checking polarity and that the string voltage stays within the inverter's limits.
  3. Mount the inverter and battery in a ventilated, shaded spot with the clearances the manufacturers specify.
  4. Install the DC protection: isolators, fuses or breakers and surge protection.
  5. Earth the system and bond the panel frames and mounting structure.
  6. Connect the inverter to your distribution board. This step, and everything on the AC side, is for a registered electrical contractor.
  7. Label every isolator and breaker so anyone can shut the system down safely.

Safety

Panels produce DC voltage whenever light falls on them, and you cannot switch them off at the panel. A home string can run at several hundred volts DC, and DC arcs do not extinguish themselves the way AC arcs tend to. Cover panels or work with isolators open, and never disconnect a string under load. Wiring and electrical safety.

Step 7: Commission it, complete the paperwork and monitor it

  • Commissioning: check string voltages and polarity, then set up the inverter correctly for your battery type, charge limits and grid settings.
  • Certificate of Compliance: the registered electrical contractor tests the installation and issues the CoC, done to SANS 10142-1. SANS 10142 explained.
  • SSEG approval: if the system is connected to the grid, apply to your municipality, or Eskom if Eskom supplies you directly, before connecting. How registration works.
  • Insurance: tell your insurer about the installation and keep the CoC on file.
  • Monitoring: most inverters have an app (ours is a Deye monitored through SolarmanPV). Check it weekly at first so you learn what normal looks like. Monitoring and maintenance.

DIY or installer?

If you are comfortable working at height and with tools, you can do much of the mounting and panel work yourself and save on labour. The connection to your home's electrical installation and the Certificate of Compliance must be done by a registered electrical contractor, so you need one involved either way.

Read can you install solar yourself in South Africa, or find a solar installer and use our installer checklist before you sign.

What it costs: our real numbers

Rather than quote generic price ranges, here is what our off-grid system actually cost, built in stages over three years. Your costs will differ, especially if your roof has no shading problem.

PhaseCost
Original system: Deye 5kW inverter, 5kWh battery, 6 JA Solar 550W panels, wiring and installationR64,500
Shading mitigation: elevated structure and tree trimmingR35,500
Array expansion: 4 JA Solar 600W panels, cabling, protection and labourR8,625
Battery upgrade: Dyness 16kWh, transport and labourR32,695
Total investedAbout R141,320

The full cost breakdown · Why the R141,000 did not hurt · How to spot a dodgy quote

Common mistakes to avoid

  • Sizing the system for summer and coming up short in winter.
  • Underestimating shading, especially from trees and neighbouring buildings in winter.
  • Leaving out surge protection, DC isolators or proper earthing to save money.
  • Buying grey-import panels that the local distributor will not support under warranty.
  • Choosing a battery that does not communicate properly with the inverter.
  • Skipping the Certificate of Compliance, or the SSEG application on a grid-connected system.

Planning the timing? See the best time of year to install solar in South Africa.

Solar Installation Guide Articles